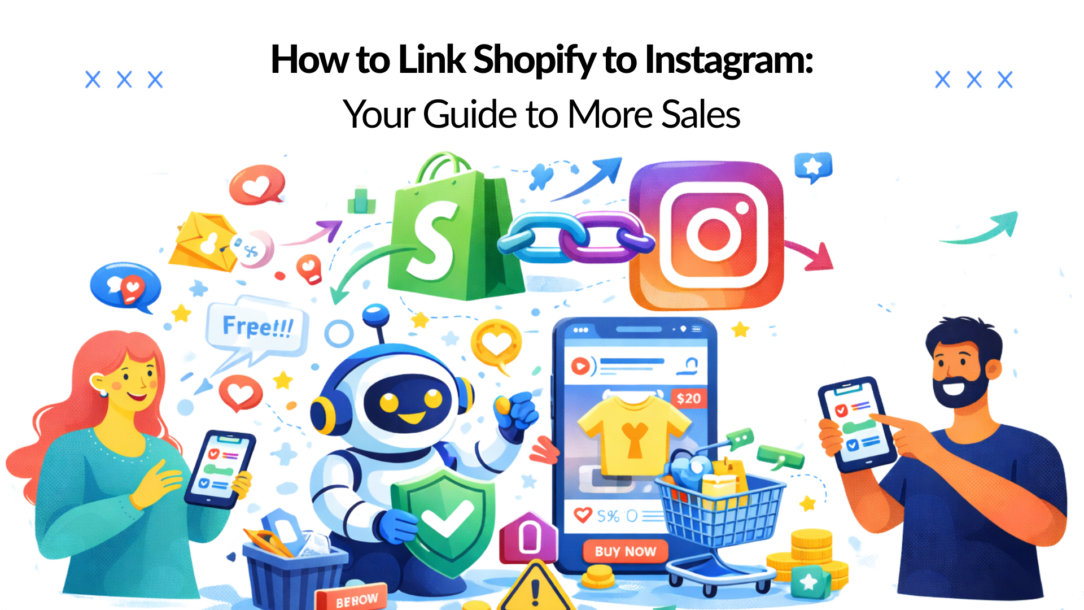
Ready to turn your Instagram followers into paying customers? The process boils down to connecting Meta’s “Facebook & Instagram” app inside your Shopify admin. This syncs your products and unlocks Instagram Shopping, transforming your profile from a simple photo gallery into a clickable, high-converting storefront.
Think of it this way: instead of just showing off your products, you’re giving your audience a direct path to purchase, right from the post or Story they’re already enjoying.
Turn Your Instagram Followers Into Shopify Customers
Instagram Social Commerce
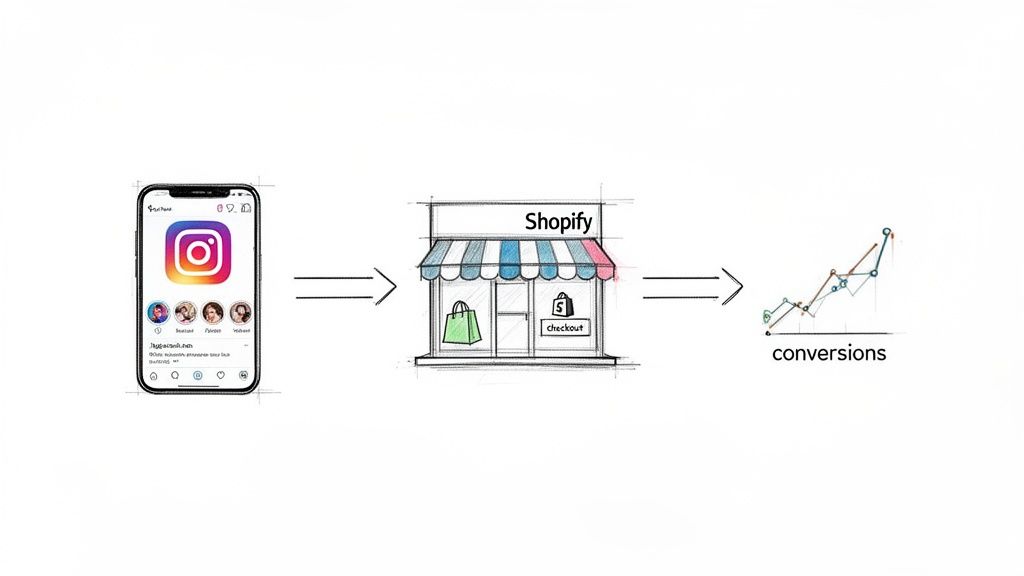
Turning your Instagram grid into a sales machine isn’t just a “nice-to-have” anymore; it’s a core strategy for modern e-commerce brands. Linking Shopify to Instagram removes the friction between a follower discovering a product they love and actually buying it. It all happens right where your audience already hangs out.
This isn’t just a technical setup; it’s a strategic move to build an automated sales funnel. The goal is to move past vanity metrics like follower counts and start tracking real results—higher conversion rates and more revenue for your business.
Why This Integration Is a Game-Changer
The numbers don’t lie: Instagram is a powerhouse for e-commerce. It’s no surprise that a massive 47.3% of Shopify stores—over 1.3 million of them—use Instagram as their go-to social channel. The platform’s visual-first nature makes it the perfect showroom for products in fashion, beauty, home goods, and countless other niches.
Once you’re connected, you can:
- Create Shoppable Content: Tag your products directly in feed posts, Reels, and Stories. For example, a fashion brand can post a Reel of a model wearing a new dress and tag the dress, allowing viewers to tap and buy instantly.
- Simplify the Buyer’s Journey: Let people browse product details, view pricing, and explore options without ever leaving the Instagram app, capturing their buying impulse at its peak.
- Drive Targeted Traffic: Funnel high-intent shoppers who are ready to buy directly to your Shopify product pages, increasing your chances of a sale.
To give you a clearer picture, here’s a quick summary of the benefits.
Why Link Shopify to Instagram: A Snapshot
This table breaks down exactly why this integration is so powerful and what kind of results you can expect to see.
| Benefit | Impact on Your Business | Key Stat |
|---|---|---|
| Frictionless Shopping | Reduces the number of clicks from discovery to purchase, capturing impulse buys. | 81% of shoppers use Instagram to research products and services. |
| Increased Conversions | Turns passive followers into active buyers by making your feed directly shoppable. | Brands see a 1,416% increase in traffic from Instagram on average after setup. |
| Higher Engagement | Shoppable tags and stickers make your content more interactive and valuable to users. | 70% of shopping enthusiasts turn to Instagram for product discovery. |
| Authentic Storytelling | Showcase products in real-world settings through user-generated content and influencer posts. | 92% of consumers trust peer recommendations over traditional advertising. |
In short, connecting these two platforms closes the loop, turning your social media presence into a direct and measurable revenue stream.
Once you’re all linked up, the job isn’t done. The next crucial step is to actively improve ecommerce conversion rates on your Shopify store. After all, sending a flood of new traffic is great, but it’s pointless if that traffic doesn’t convert into sales.
This guide gives you the high-level roadmap, explaining why this integration is so vital for growth. If you want to dig deeper into specific selling tactics, be sure to check out our complete guide on how to sell on Instagram for free. By the end, you’ll have the actionable knowledge needed to connect your accounts and unlock a powerful new sales channel.
Step 1: Lay the Groundwork for a Smooth Setup
Before you can start tagging products and making sales on Instagram, you need to build a solid foundation. If you jump ahead without getting these core pieces in place, you’re just setting yourself up for headaches and a likely rejection from Meta.
First things first: you obviously need a Shopify store that’s live and stocked with products. If you’re brand new to the platform, figuring out how to set up a Shopify store is your absolute starting point. Everything else hinges on having a functional storefront.
Once that’s handled, it’s time for a pre-flight check. Getting these next few steps right is the difference between a smooth approval and weeks of frustrating back-and-forth with support.
Convert to a Professional Instagram Account
Your personal Instagram profile isn’t going to cut it. You have to switch to either a Business or Creator account. This is a non-negotiable step that unlocks all the professional tools you’ll need, including the ability to connect a product catalog.
- Business Account: This is the best choice for most e-commerce brands. It lets you add contact buttons (like email and phone) and even a physical address, which helps build customer trust.
- Creator Account: This is tailored more for public figures, artists, and influencers. You get more flexible profile controls and analytics focused on audience growth.
For 99% of Shopify stores, the Business account is the right move. It’s a simple toggle in your Instagram settings under “Account type and tools.” Switching officially flags your profile as a commercial entity to Meta. For a deeper dive, we’ve covered all the other benefits an Instagram Business profile gives your brand.
Link to a Facebook Page and Business Manager
Here’s another mandatory step: Your Instagram Business account must be linked to a corresponding Facebook Page for your brand. This entire connection is managed through Meta Business Suite (formerly Facebook Business Manager), which acts as the central command center for all your business assets.
Why is this so critical? Meta uses this link to verify your business identity and manage your product catalog across both Instagram and Facebook. Without this connection, the “Facebook & Instagram” sales channel in Shopify will have nothing to connect to. It’s a dead end.
Verifying your domain is another key hurdle. Meta needs to confirm you actually own the website you plan to send shoppers to. This proves you’re a legitimate business and not just trying to impersonate another brand or send traffic somewhere shady.
Make sure you have access to your website’s backend now, because you’ll need it for the verification process. Getting these three pillars sorted—the professional account, the linked Facebook Page, and the verified domain—will make the rest of the setup feel like a breeze.
Step 2: Install and Configure the Meta Sales Channel
Alright, with the groundwork done, it’s time for the main event: connecting the Facebook & Instagram sales channel inside your Shopify admin. This is the crucial step where your Shopify store and Instagram profile officially shake hands.
Think of this app as the bridge that makes the magic happen. It takes your product catalog—every title, image, description, price, and inventory count—and pipes it directly into Meta’s Commerce Manager. You’re essentially creating a digital twin of your product list that lives inside the Meta ecosystem, ready for tagging.
This isn’t just a “nice to have” integration. It’s the most popular sales channel on the entire Shopify platform. A recent report on Shopify technology usage shows that 47.8% of stores use Instagram, a testament to how vital this channel has become for modern e-commerce.
Navigating the Initial Setup
Once you’ve added the “Facebook & Instagram” app from the Shopify App Store, a setup wizard will walk you through the connections. You’ll need to log into your Facebook account, pick the right Meta Business Manager, and link the Facebook Page you set up earlier.
Pay close attention here. If you manage multiple Business Managers or Facebook Pages, it’s easy to click the wrong one. Slow down and triple-check that you’re selecting the assets tied directly to your Shopify store. Choosing the wrong one is a common mistake that causes massive syncing errors.
This visual breaks down how all the pieces need to fit together for a successful setup.
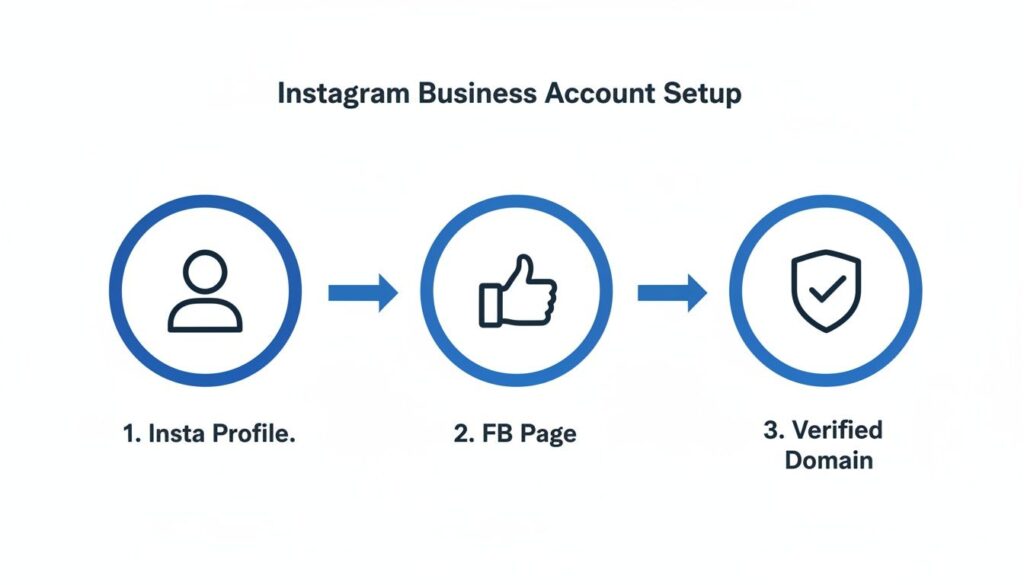
Instagram Business Setup
As you can see, there’s a direct line of connection from your Instagram profile, through your Facebook Page, all pointing to your verified domain. This is exactly what Meta looks for during the approval process.
Choosing Your Data Sharing Level
During the setup, you’ll hit a critical step: choosing your customer data-sharing level. This setting controls how much customer behavior data your Meta Pixel collects and sends back to Meta for ad optimization. Shopify offers three levels.
-
Conservative: The bare-bones option. It uses only basic Pixel functions. It’s the most private setting but gives you the least amount of data for ad targeting and measuring results.
-
Enhanced: A great middle-of-the-road choice. It uses the Meta Pixel and securely shares more customer data from Shopify’s backend to match users more accurately, leading to better ad targeting.
-
Maximum: This is what you want for peak performance. It fires up the Meta Pixel, uses backend data sharing, and leverages the Conversions API to send the most complete dataset to Meta. This gives you the best possible ad performance, audience building, and measurement.
Our Recommendation: Go with Maximum. Unless you have very specific privacy constraints, this setting feeds Meta’s ad algorithms the richest data possible. Better data means more efficient ad spend, dead-on-accurate retargeting, and a much clearer picture of your return on investment.
By carefully configuring this sales channel, you ensure your products sync correctly, and your marketing data is as powerful as it can be. This sets you up perfectly for the final approval stage.
Step 3: Finalize Your Setup and Get Approved
You’ve connected your Shopify store and Meta accounts. You’re on the home stretch now. The last major hurdle is submitting your store for review and getting Meta’s official stamp of approval for Instagram Shopping. This part can feel like a waiting game, but a few key actions can ensure it goes smoothly.
First up, and this is non-negotiable: domain verification. This is how you prove to Meta that you are the legitimate owner of your Shopify store’s URL. You’ll handle this right inside your Meta Business Suite, and it’s a critical step for building trust and getting that green light.
Once you’ve submitted everything through the “Facebook & Instagram” sales channel in Shopify, your account officially enters the review queue. This isn’t an instant process. Be prepared to wait anywhere from a few days to a couple of weeks.
What Meta’s Review Team Looks For
Meta’s approval process is all about ensuring a safe and trustworthy shopping environment. Their team is essentially checking to see if you’re a real, established business that people can trust.
They look for a few key signals:
- An Established Presence: Your Instagram account shouldn’t look like it was created yesterday. A history of consistent, quality content shows you’re an active, serious business.
- Trustworthiness: Your profile needs to be complete. That means a clear bio, a professional profile picture, and accessible contact information. Having a link to a privacy policy and terms of service on your Shopify site also helps tremendously.
- Compliance: Your products absolutely must adhere to Meta’s Commerce Policies. Selling prohibited items is one of the most common reasons for rejection, so double-check that you aren’t offering anything on their restricted list.
Don’t just sit back and wait after you hit “submit.” Use this waiting period to keep building your Instagram presence. Post engaging content, interact with your followers, and maybe even run a few standard ads. In Meta’s eyes, an active account is a trustworthy account.
Enabling Shopping and Testing Your Tags
Once you get that exciting approval notification, it’s time to flip the switch. You’ll need to pop into your Instagram account’s professional settings and officially turn on the Shopping features.
Just navigate to Settings and privacy > Business tools and controls > Set Up Instagram Shopping. Follow the last few prompts to connect the product catalog you synced from Shopify. Your profile will now have that coveted “View Shop” button, and you can finally start using product tags.
The very first thing you should do is test the entire customer journey. Create a new post or story and tag one of your products.
- Tap the tag on your post. This should open the product details page right inside the Instagram app.
- Check that the image, title, and price are all displaying correctly.
- Click the “View on Website” button.
- Make sure it sends you directly to the correct product page on your live Shopify store.
This simple test confirms all your hard work has paid off. You’ve successfully figured out how to link Shopify to Instagram, creating a seamless path from discovery to purchase. Now, every post can be a shoppable moment.
Bonus: Automate DMs to Drive More Conversions
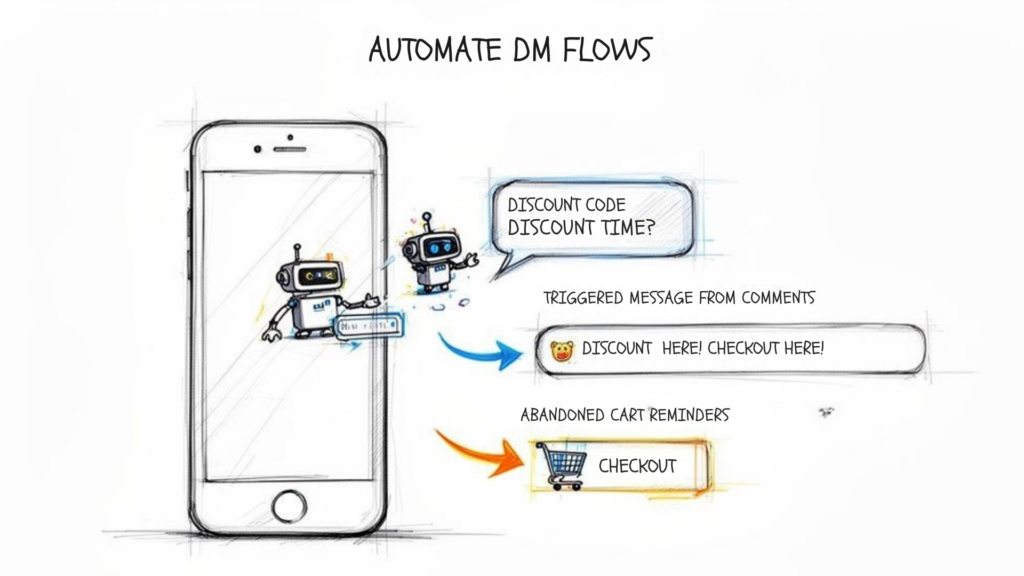
Automate DM for Conversion
Getting your Shopify store linked to Instagram is a massive step, but it’s really just the starting line. The real growth engine kicks in when you pair your new shoppable posts with smart automation. This is how you build a system that engages customers instantly and nudges them toward a purchase. You’re moving from passive selling to an active sales machine.
By automating your Instagram DMs, you can grab leads that would otherwise go cold. You can also provide 24/7 customer service that’s impossible to manage manually. It’s the secret to turning casual interest into active sales, all at scale.
Turn Engagement into Instant Conversations
Think about it from a customer’s perspective. They see your shoppable post, love the product, but have a quick question. They leave a comment. How long until you see it and reply? An hour? Maybe a day? By then, the impulse is gone. They’ve moved on.
This is where automation becomes your unfair advantage. You can set up conversational flows that trigger instantly based on user actions.
- Comment Automation: A user comments, “What colors does this come in?” on your post. Right away, an automated DM hits their inbox: “Thanks for asking! Our new hoodie comes in black, navy, and heather gray. You can see them all here,” complete with a direct link to your product page.
- Story Reactions: Someone drops a 🔥 emoji on your Story showcasing a new collection. An automation can immediately send them a DM saying, “Glad you liked our new collection! As a thank you, here’s a 10% discount code: NEW10.”
These instant, personal interactions make shoppers feel seen. You’re meeting their curiosity with immediate, helpful answers, which dramatically increases the chance they’ll buy. For a deeper dive into the possibilities, our guide to Instagram DM automation is packed with advanced strategies.
Recover Sales and Nurture Leads Automatically
Automation isn’t just for that first touchpoint; it’s a game-changer for recovering sales and nurturing leads. Once you’ve connected Shopify and Instagram, you can build surprisingly sophisticated follow-up sequences.
Imagine a shopper clicks a product tag, adds an item to their cart on your Shopify site, but then gets distracted and leaves. Without automation, that sale is likely gone. But with an integrated system, you can build a safety net.
By connecting your systems, you can identify that user’s Instagram handle and trigger an automated DM a few hours later: “Hey, it looks like you left something behind! We’ve saved your cart for you. Let us know if you have any questions before checking out.”
This simple nudge can recover a huge percentage of otherwise lost sales.
Here’s another powerful example for a clothing brand:
- A user DMs you the keyword “STYLEGUIDE.”
- An automation kicks in, asking a couple of quick questions: “Are you looking for casual or formal wear?” and “What’s your favorite season to dress for?”
- Based on their answers, the bot sends them a curated lookbook with links to the exact shoppable products on your site.
This approach transforms your Instagram DMs from a simple inbox into an interactive sales channel. You’re not just showing products; you’re actively guiding customers to the perfect purchase, building a relationship that brings them back again and again.
Common Hurdles When Connecting Shopify to Instagram (And How to Clear Them)
Even with the best guide, it’s normal to hit a snag when you’re figuring out how to link Shopify to Instagram. Meta’s rules are notoriously specific, and the approval process can sometimes feel like a total black box. Let’s tackle the most common roadblocks merchants run into, with clear answers to get you unstuck and selling.
Now that your store is connected and your products are taggable, it’s time to supercharge your engagement and turn those views into sales. With Clepher, you can build automations that answer product questions in your DMs instantly, send discount codes to interested users, and even recover abandoned carts automatically. Stop letting potential customers slip through the cracks and turn your Instagram into a 24/7 sales machine. Explore what you can build with Clepher today.

Related Posts
How to Create a Killer Poll Game on Instagram to Boost Engagement and Leads
March 24, 202612 Fresh Social Media Content Ideas That Convert in 2026
March 23, 2026Elevate Your Customer Experience with Conversational AI for Customer Engagement
March 22, 2026
Founder Clepher